

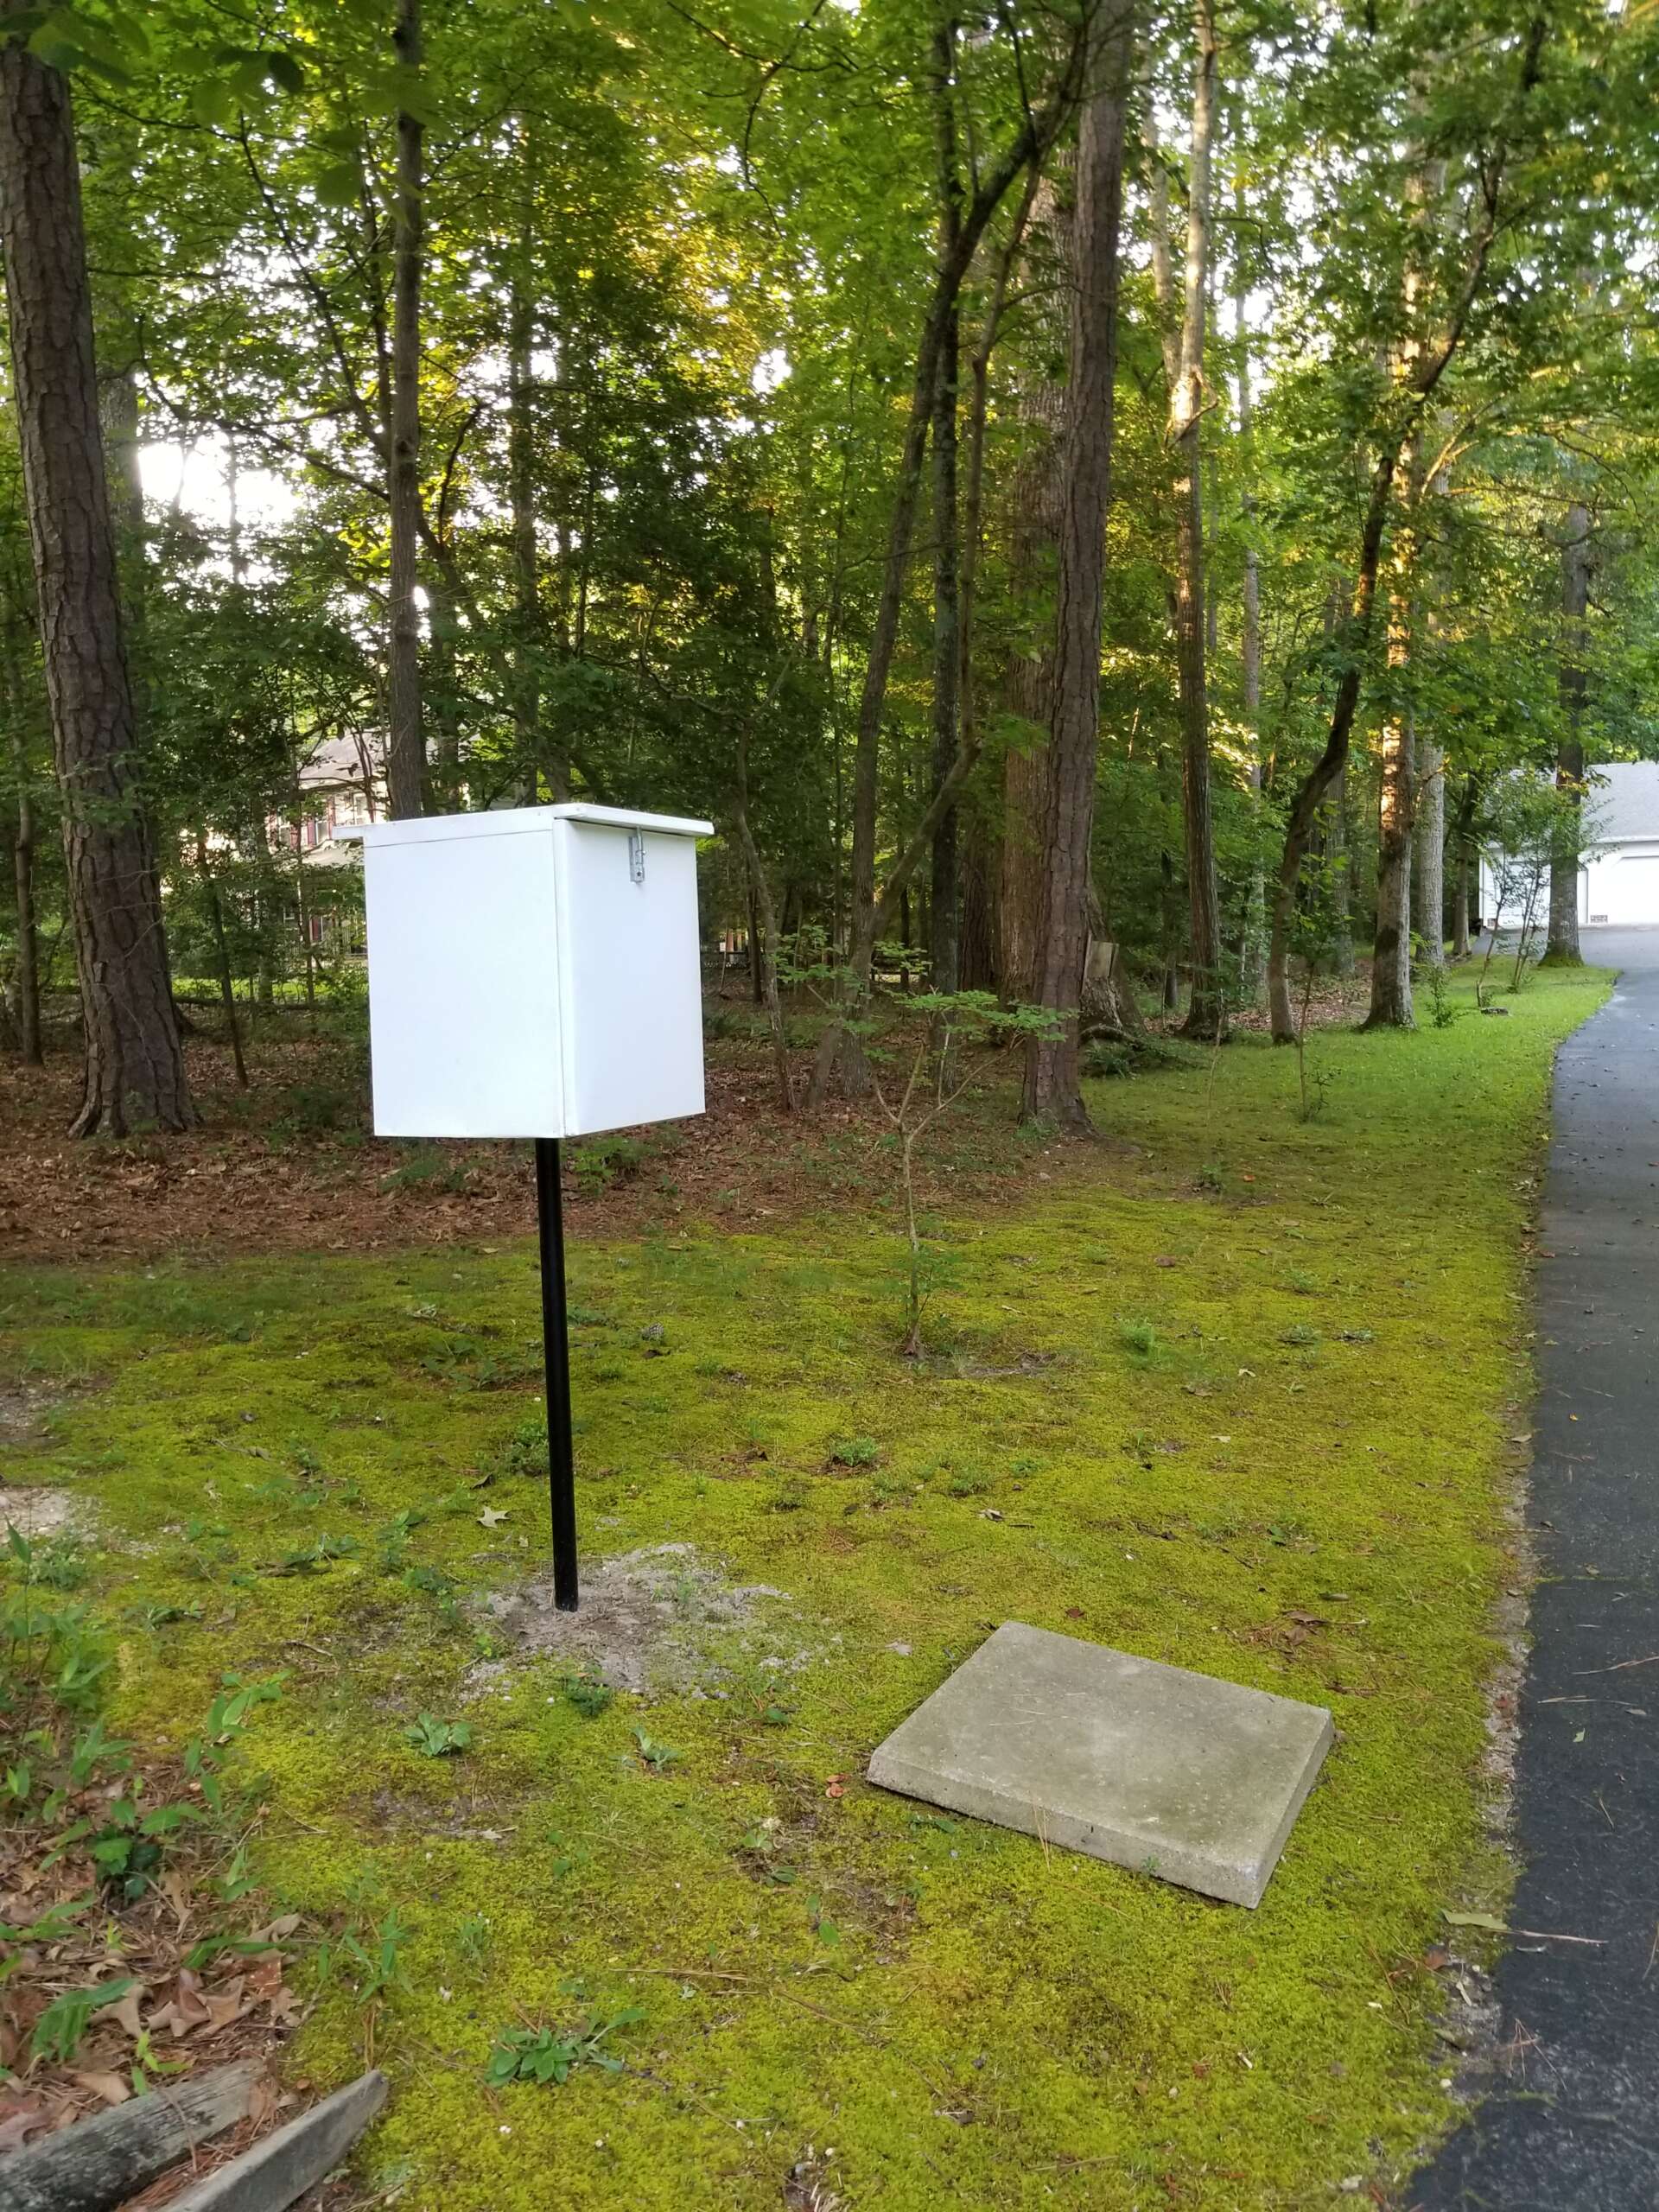
Instructions For Collecting & Delivering Samples
Biotech Laboratory specializes in bacteria water tests and chemical water tests. (If you’re not sure what type of test you need, please see our FAQs or contact us.) We provide instructions for collecting bacteria and chemical samples so you can collect a sample and drop it off at our Chesterfield, VA, location; please contact us for the address.
We provide sterile containers for bacteria testing. For chemical samples, you can use a 6-12 oz clean drinking water bottle (your own or one we can provide). First time clients – please call prior to collecting or delivering a sample, to review instructions and to alleviate the need to resample or make multiple trips. If you are selling or purchasing property, please see our FAQs page for additional information. We can provide contact information for companies that collect and deliver samples as part of their service.
1. Materials
Step 1: Pick up materials. Supplies are available in our drop box, 24/7. This includes full instructions, drop-off form and collection containers.
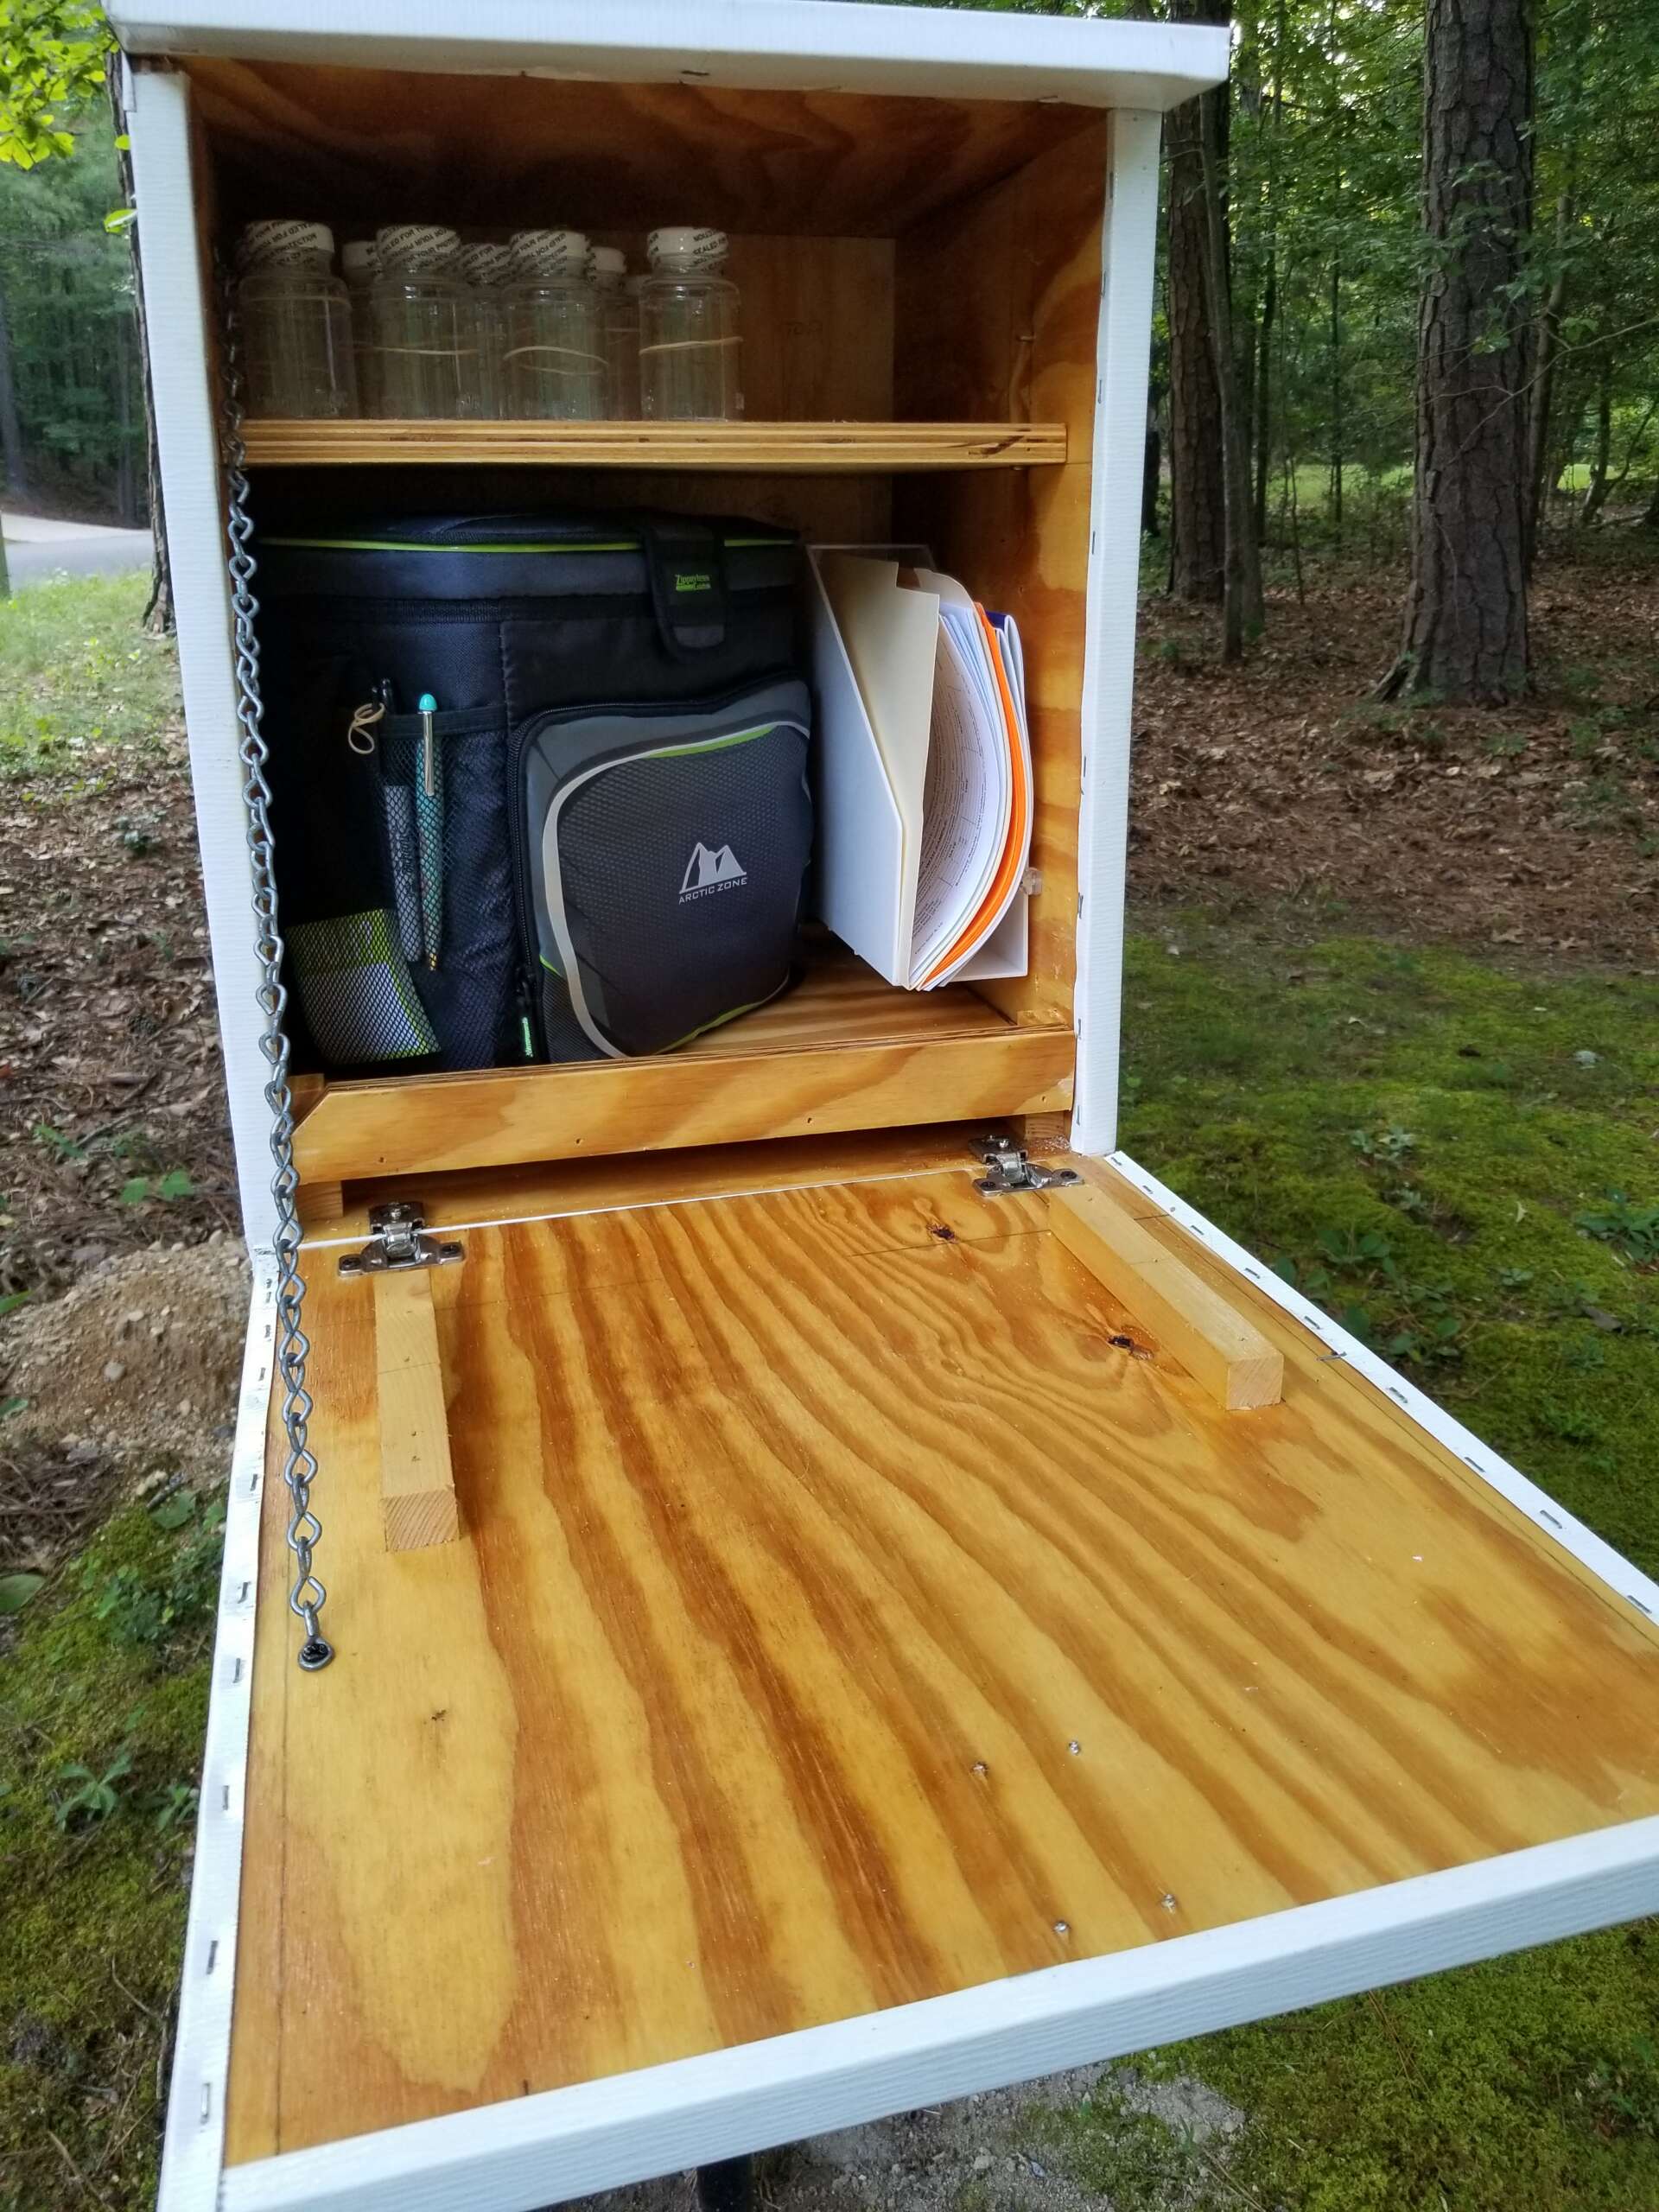
2. Sterile Container
Step 2: Obtain a sterile container(s) from the top shelf.
These must be used for bacteria testing. For chemical testing, use a 6-12 oz clean drinking water bottle (your own or feel free to use one from the large cooler on the ground).
Do not use a sterile container for chemical samples.
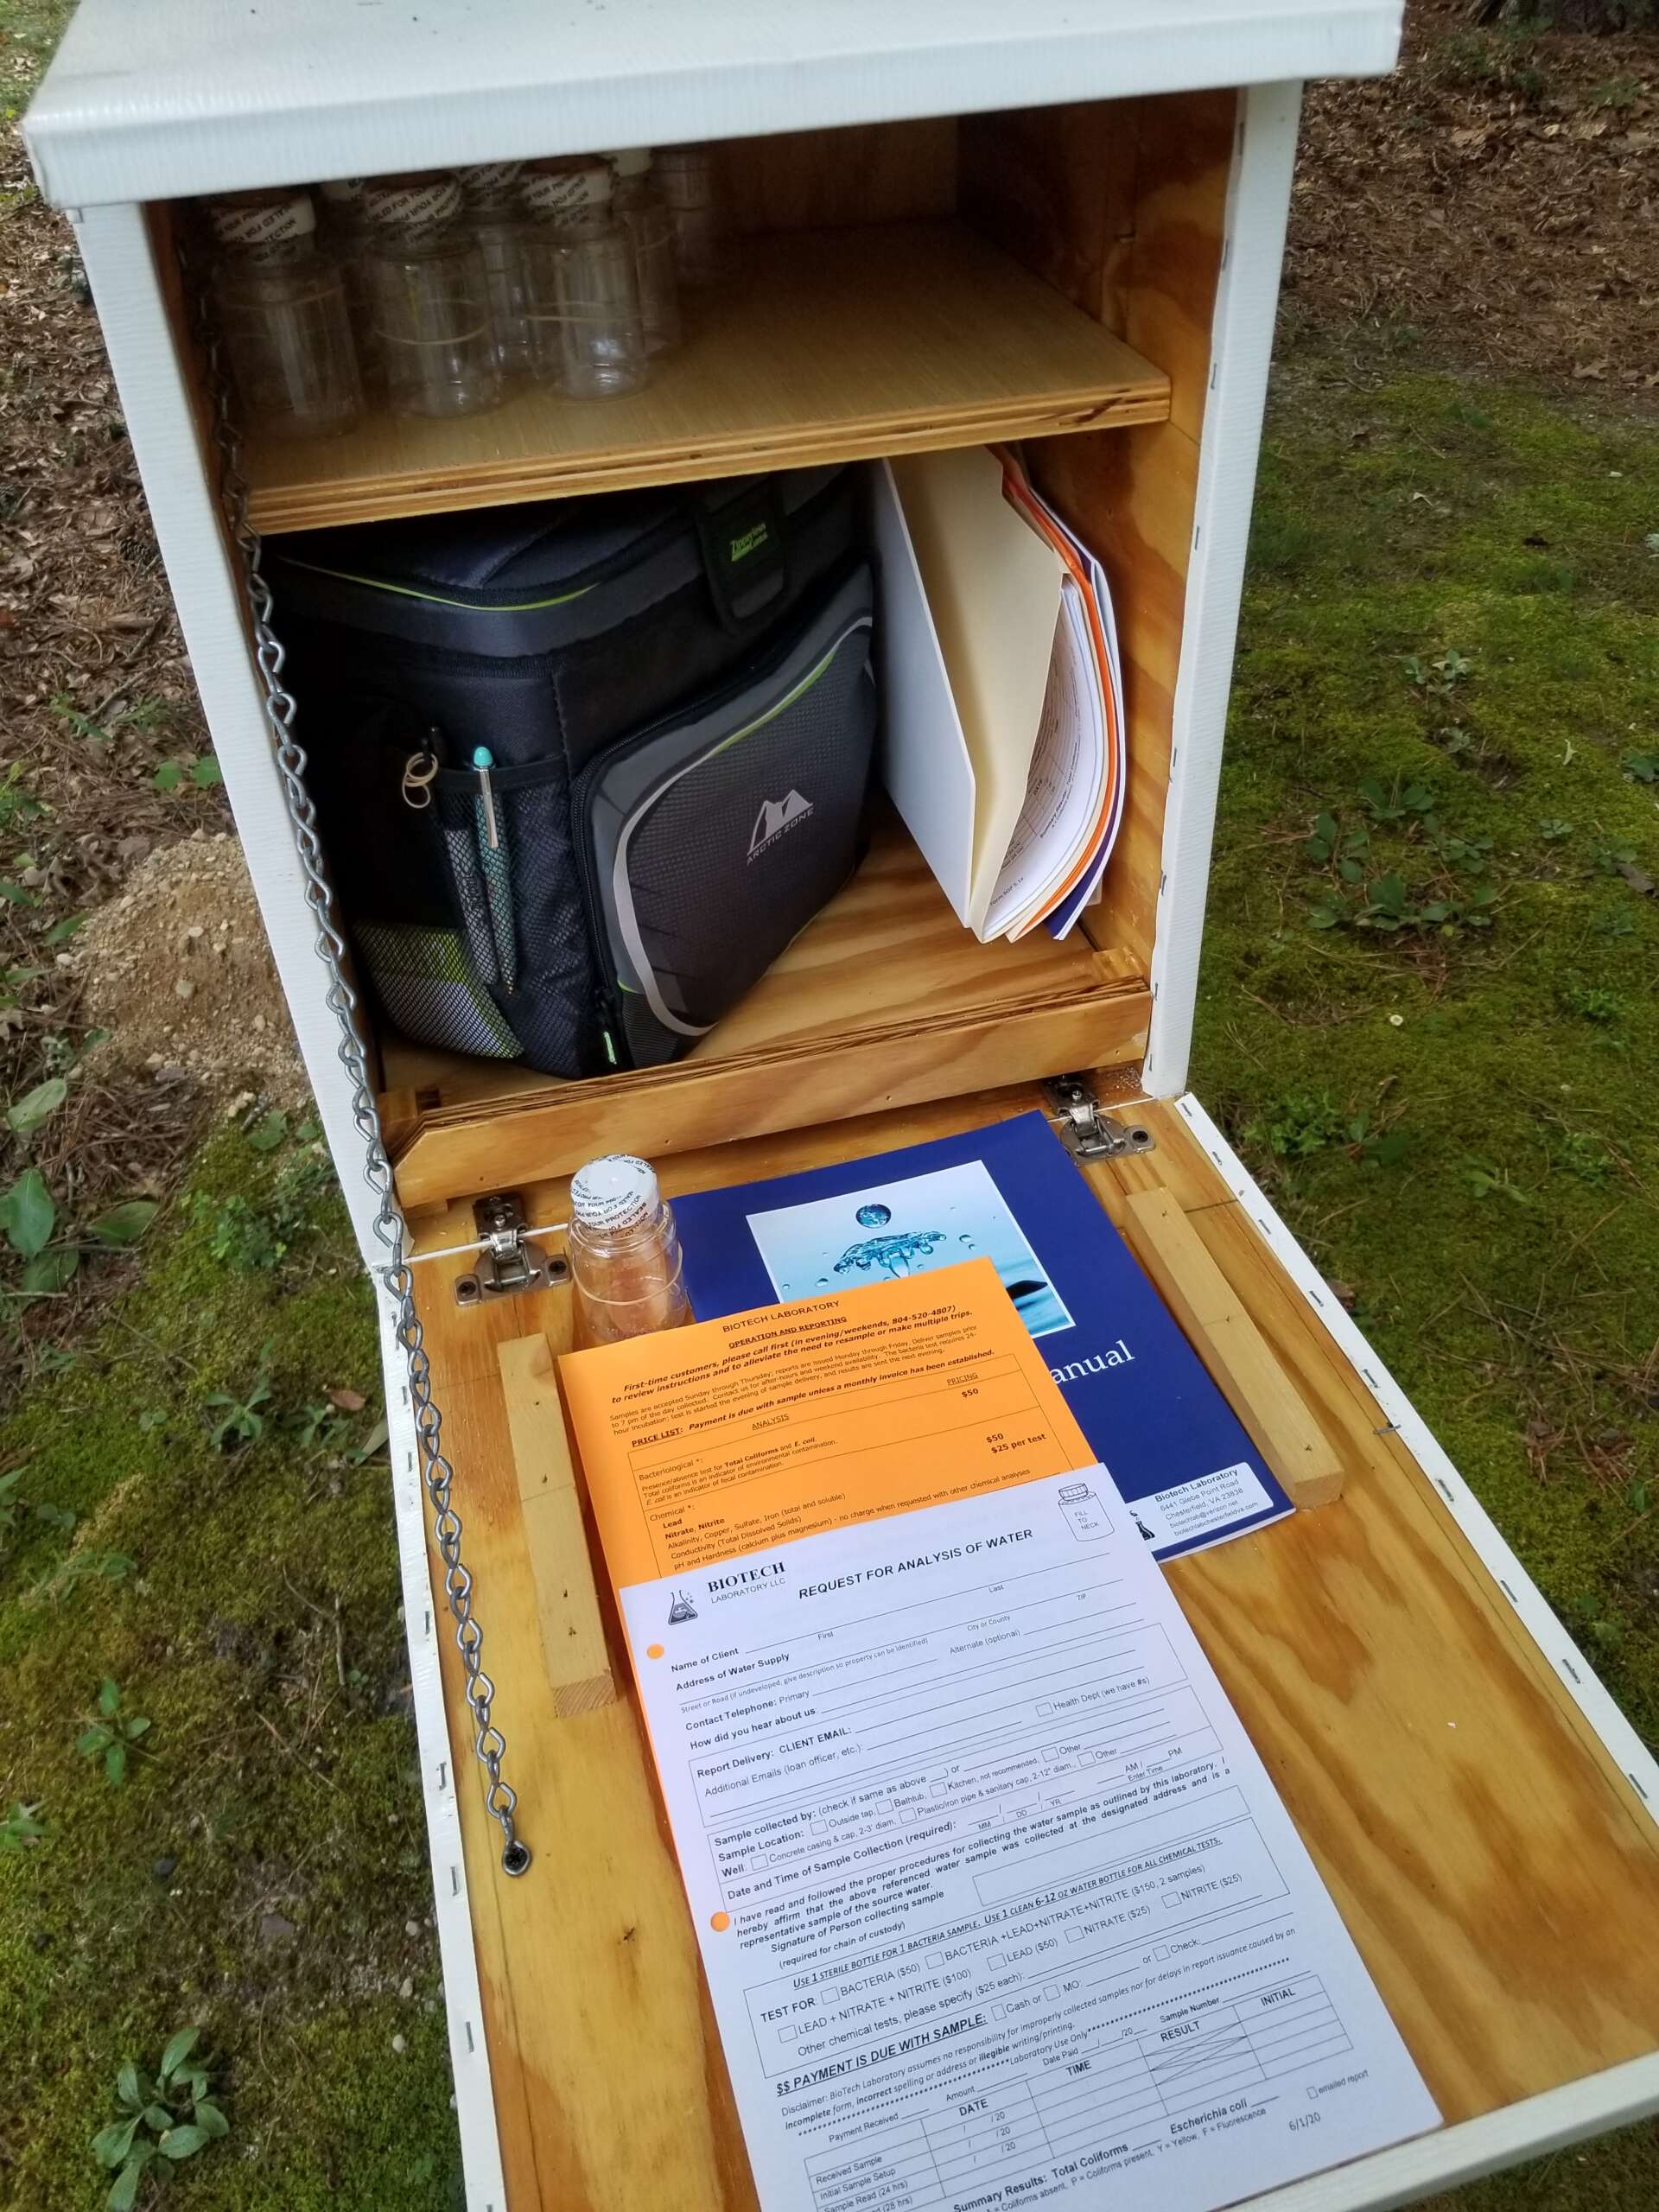
3. Form & Instructions
Step 3: Take a white drop-off form and orange instructions (also downloadable here) from the inside door of the drop box. The drop-off form must be delivered with your sample. Feel free to take a well owners manual for your reference.
4. Collect The Sample
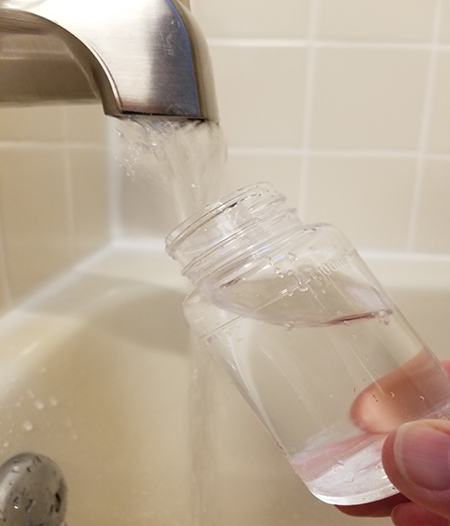
Step 4: Collect the sample. Detailed instructions are provided for sanitizing the faucet and flushing the line. Samples from the kitchen faucet are not recommended; samples from a bathtub faucet are preferred.
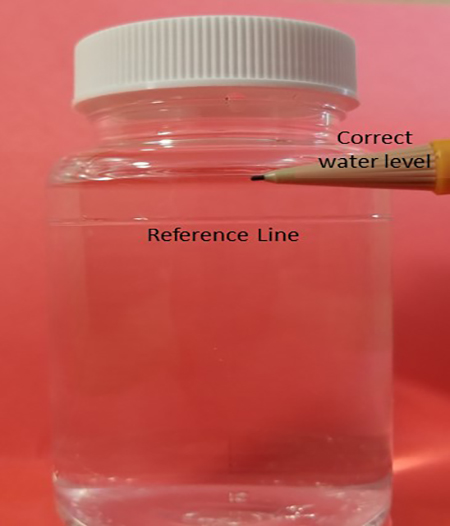
5. Correct Water Level
Step 5: Fill the container to the neck. Make sure you have the correct water level. Too much water is better than not enough. If water level is too low, the sample must be rejected. Ignore the line. We understand the line causes confusion. Please ignore it and fill the container to the NECK.
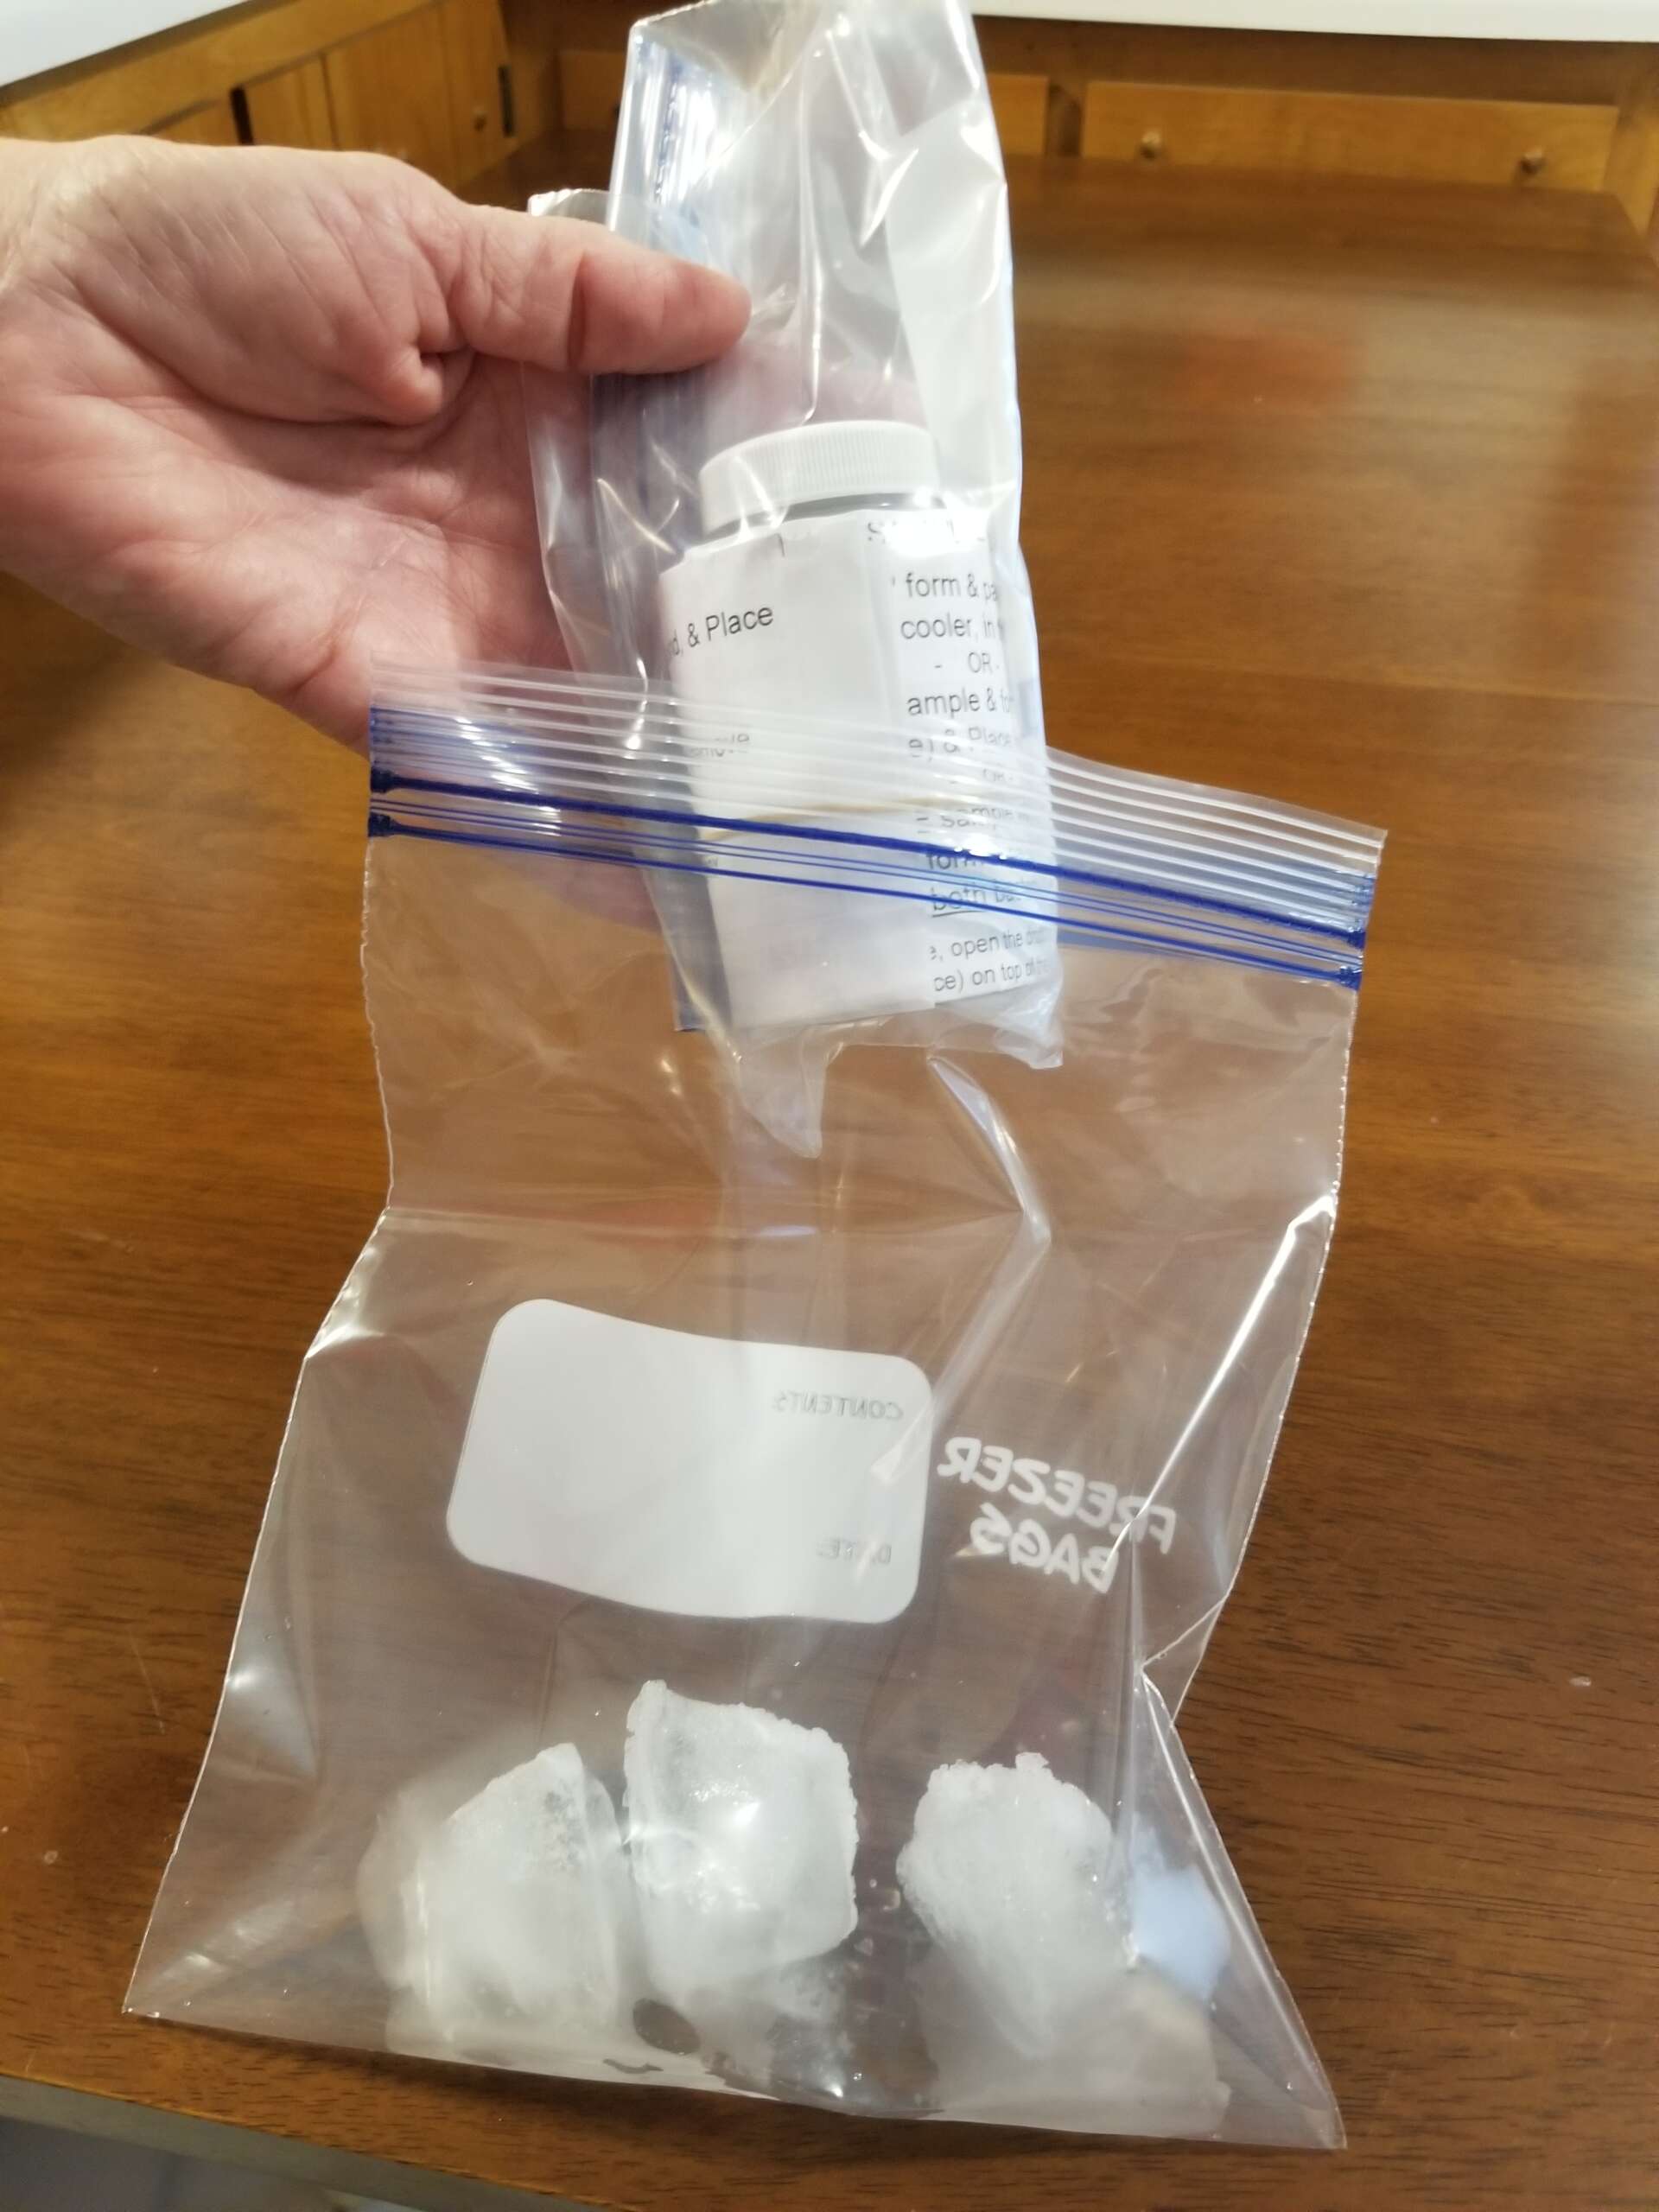
6. Keep Sample Cool
Step 6: Samples for bacteria testing MUST be kept cool during transport, without getting form wet. Fold and wrap form and payment around container, secure with the rubber band. Place inside a small baggie. Place that baggie inside a second small baggie with 3 ice cubes.
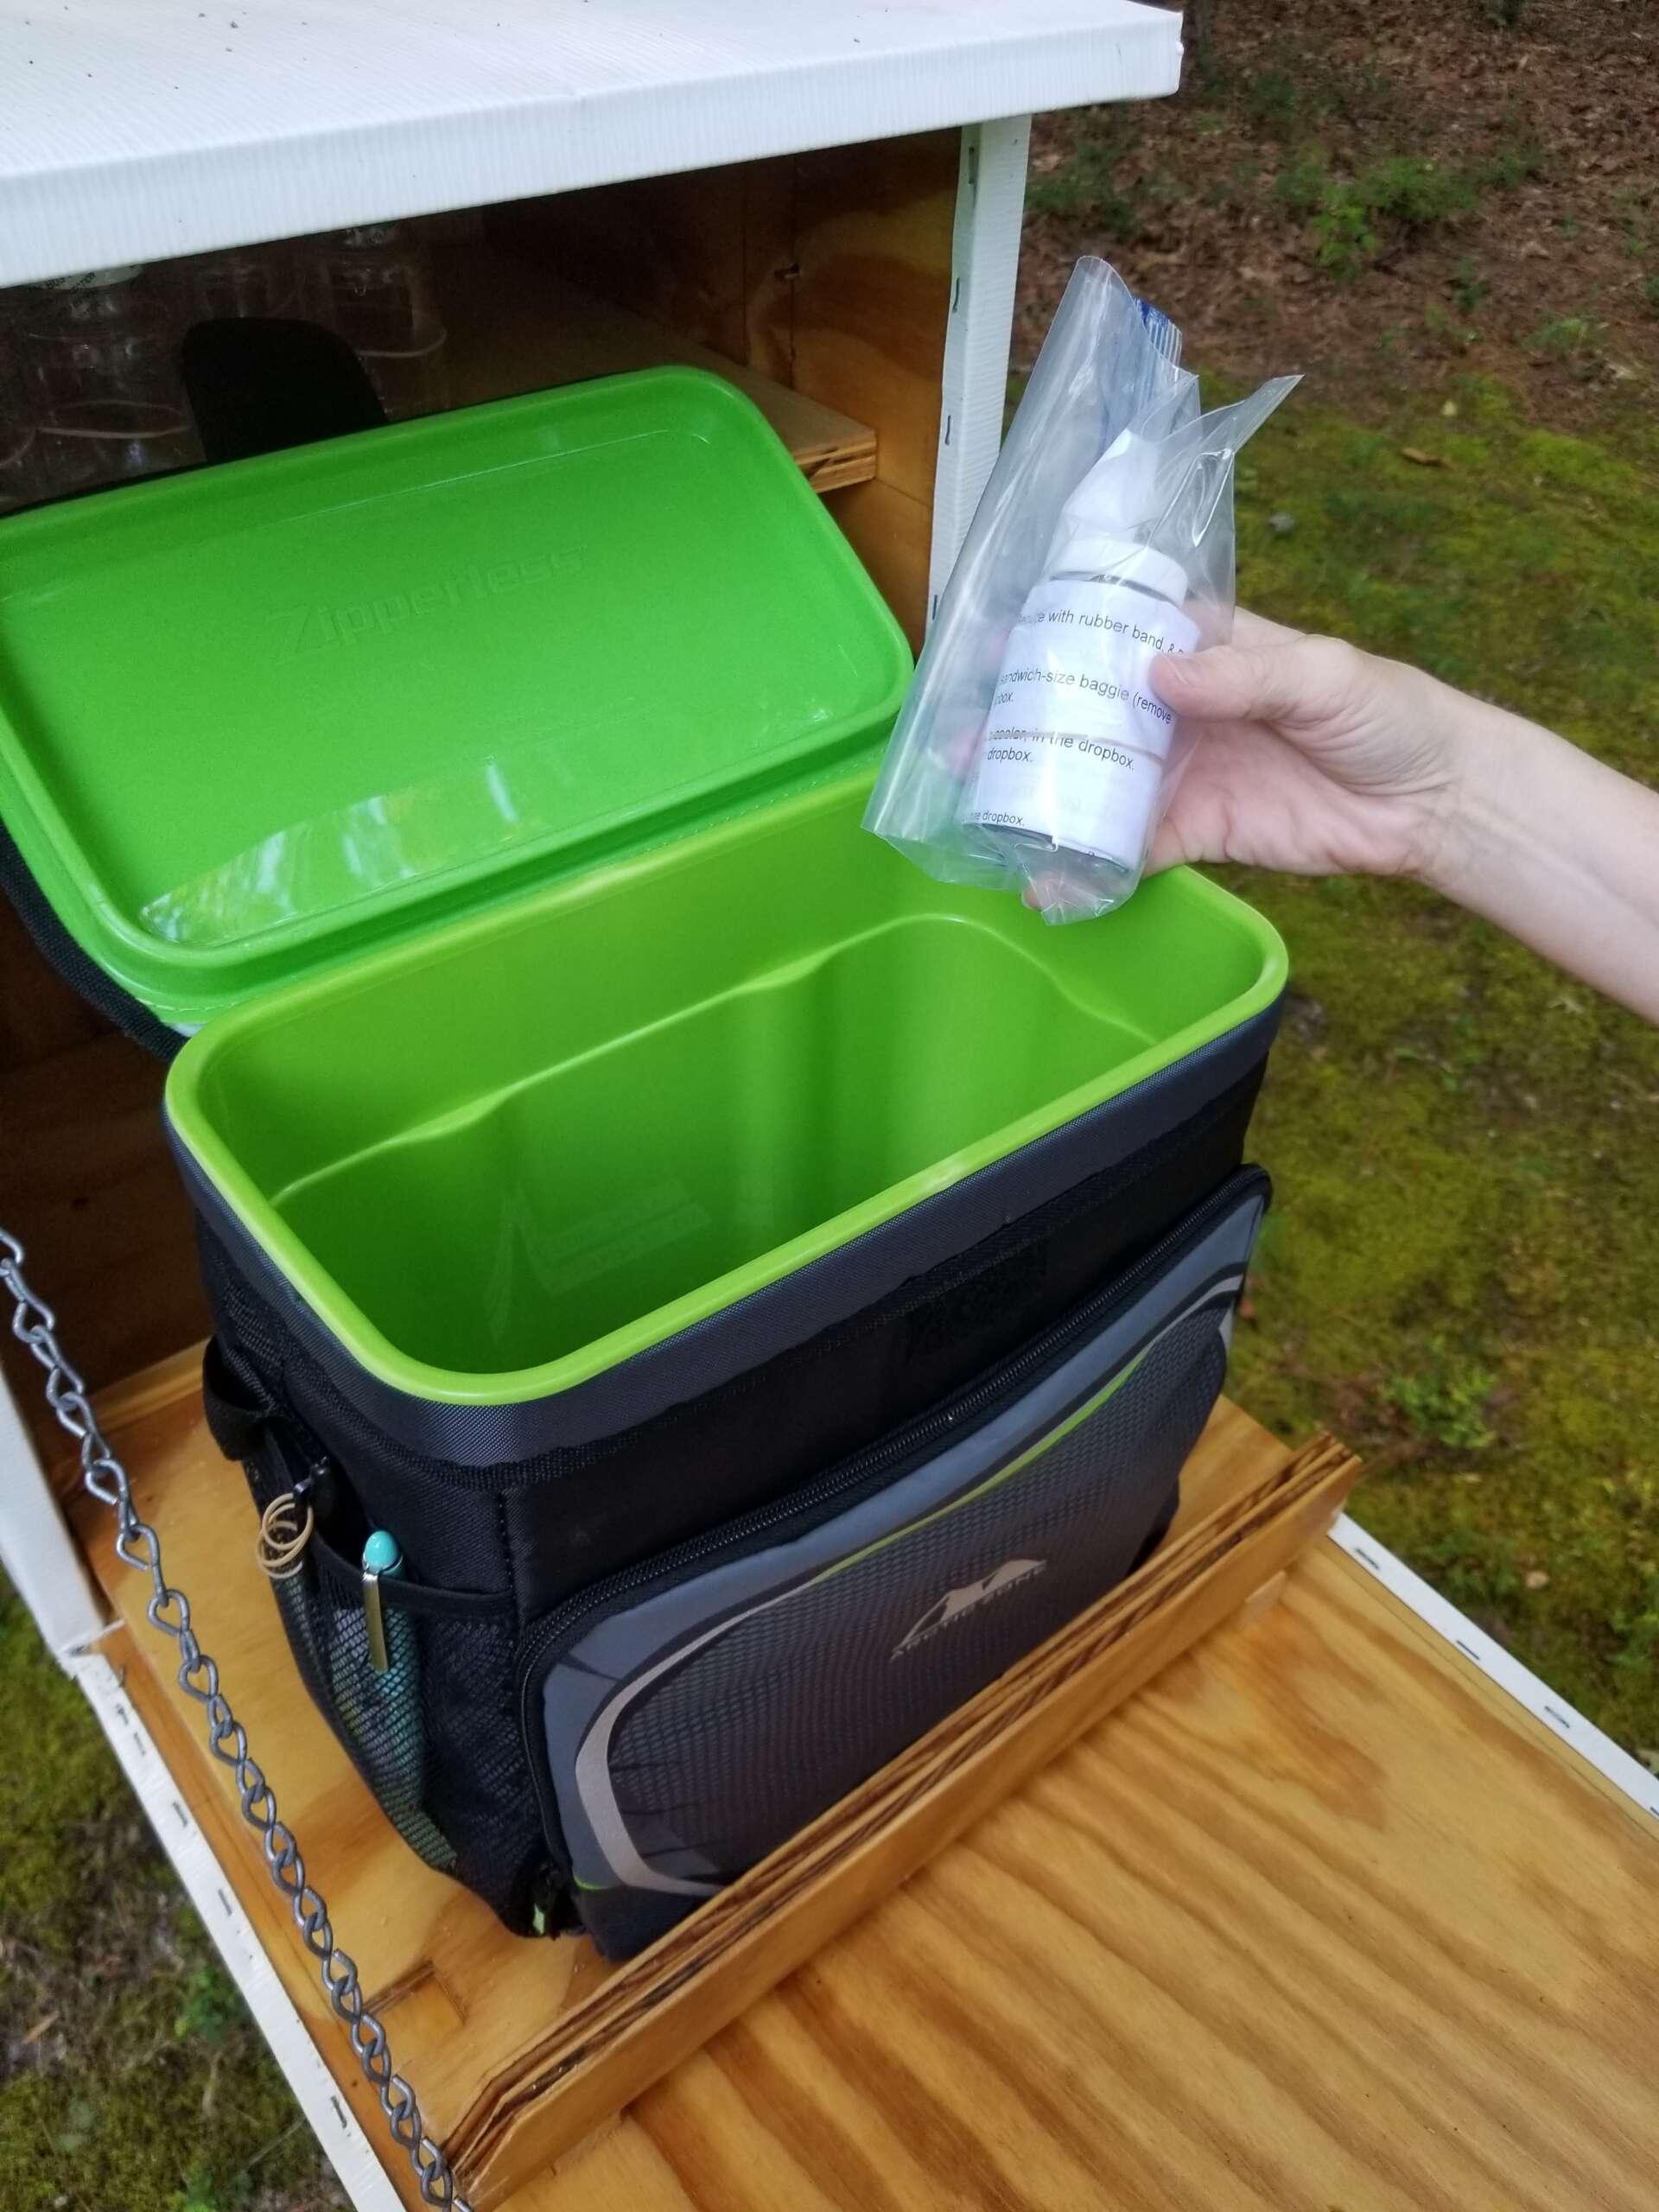
7. Deliver The Sample
Step 7: Deliver the sample. the same day you collect it. At the dropbox, remove inner baggie (with sample) from second baggie, and place inner baggie only in cooler in the dropbox. Take your second baggie with you, and dump the ice on the ground.
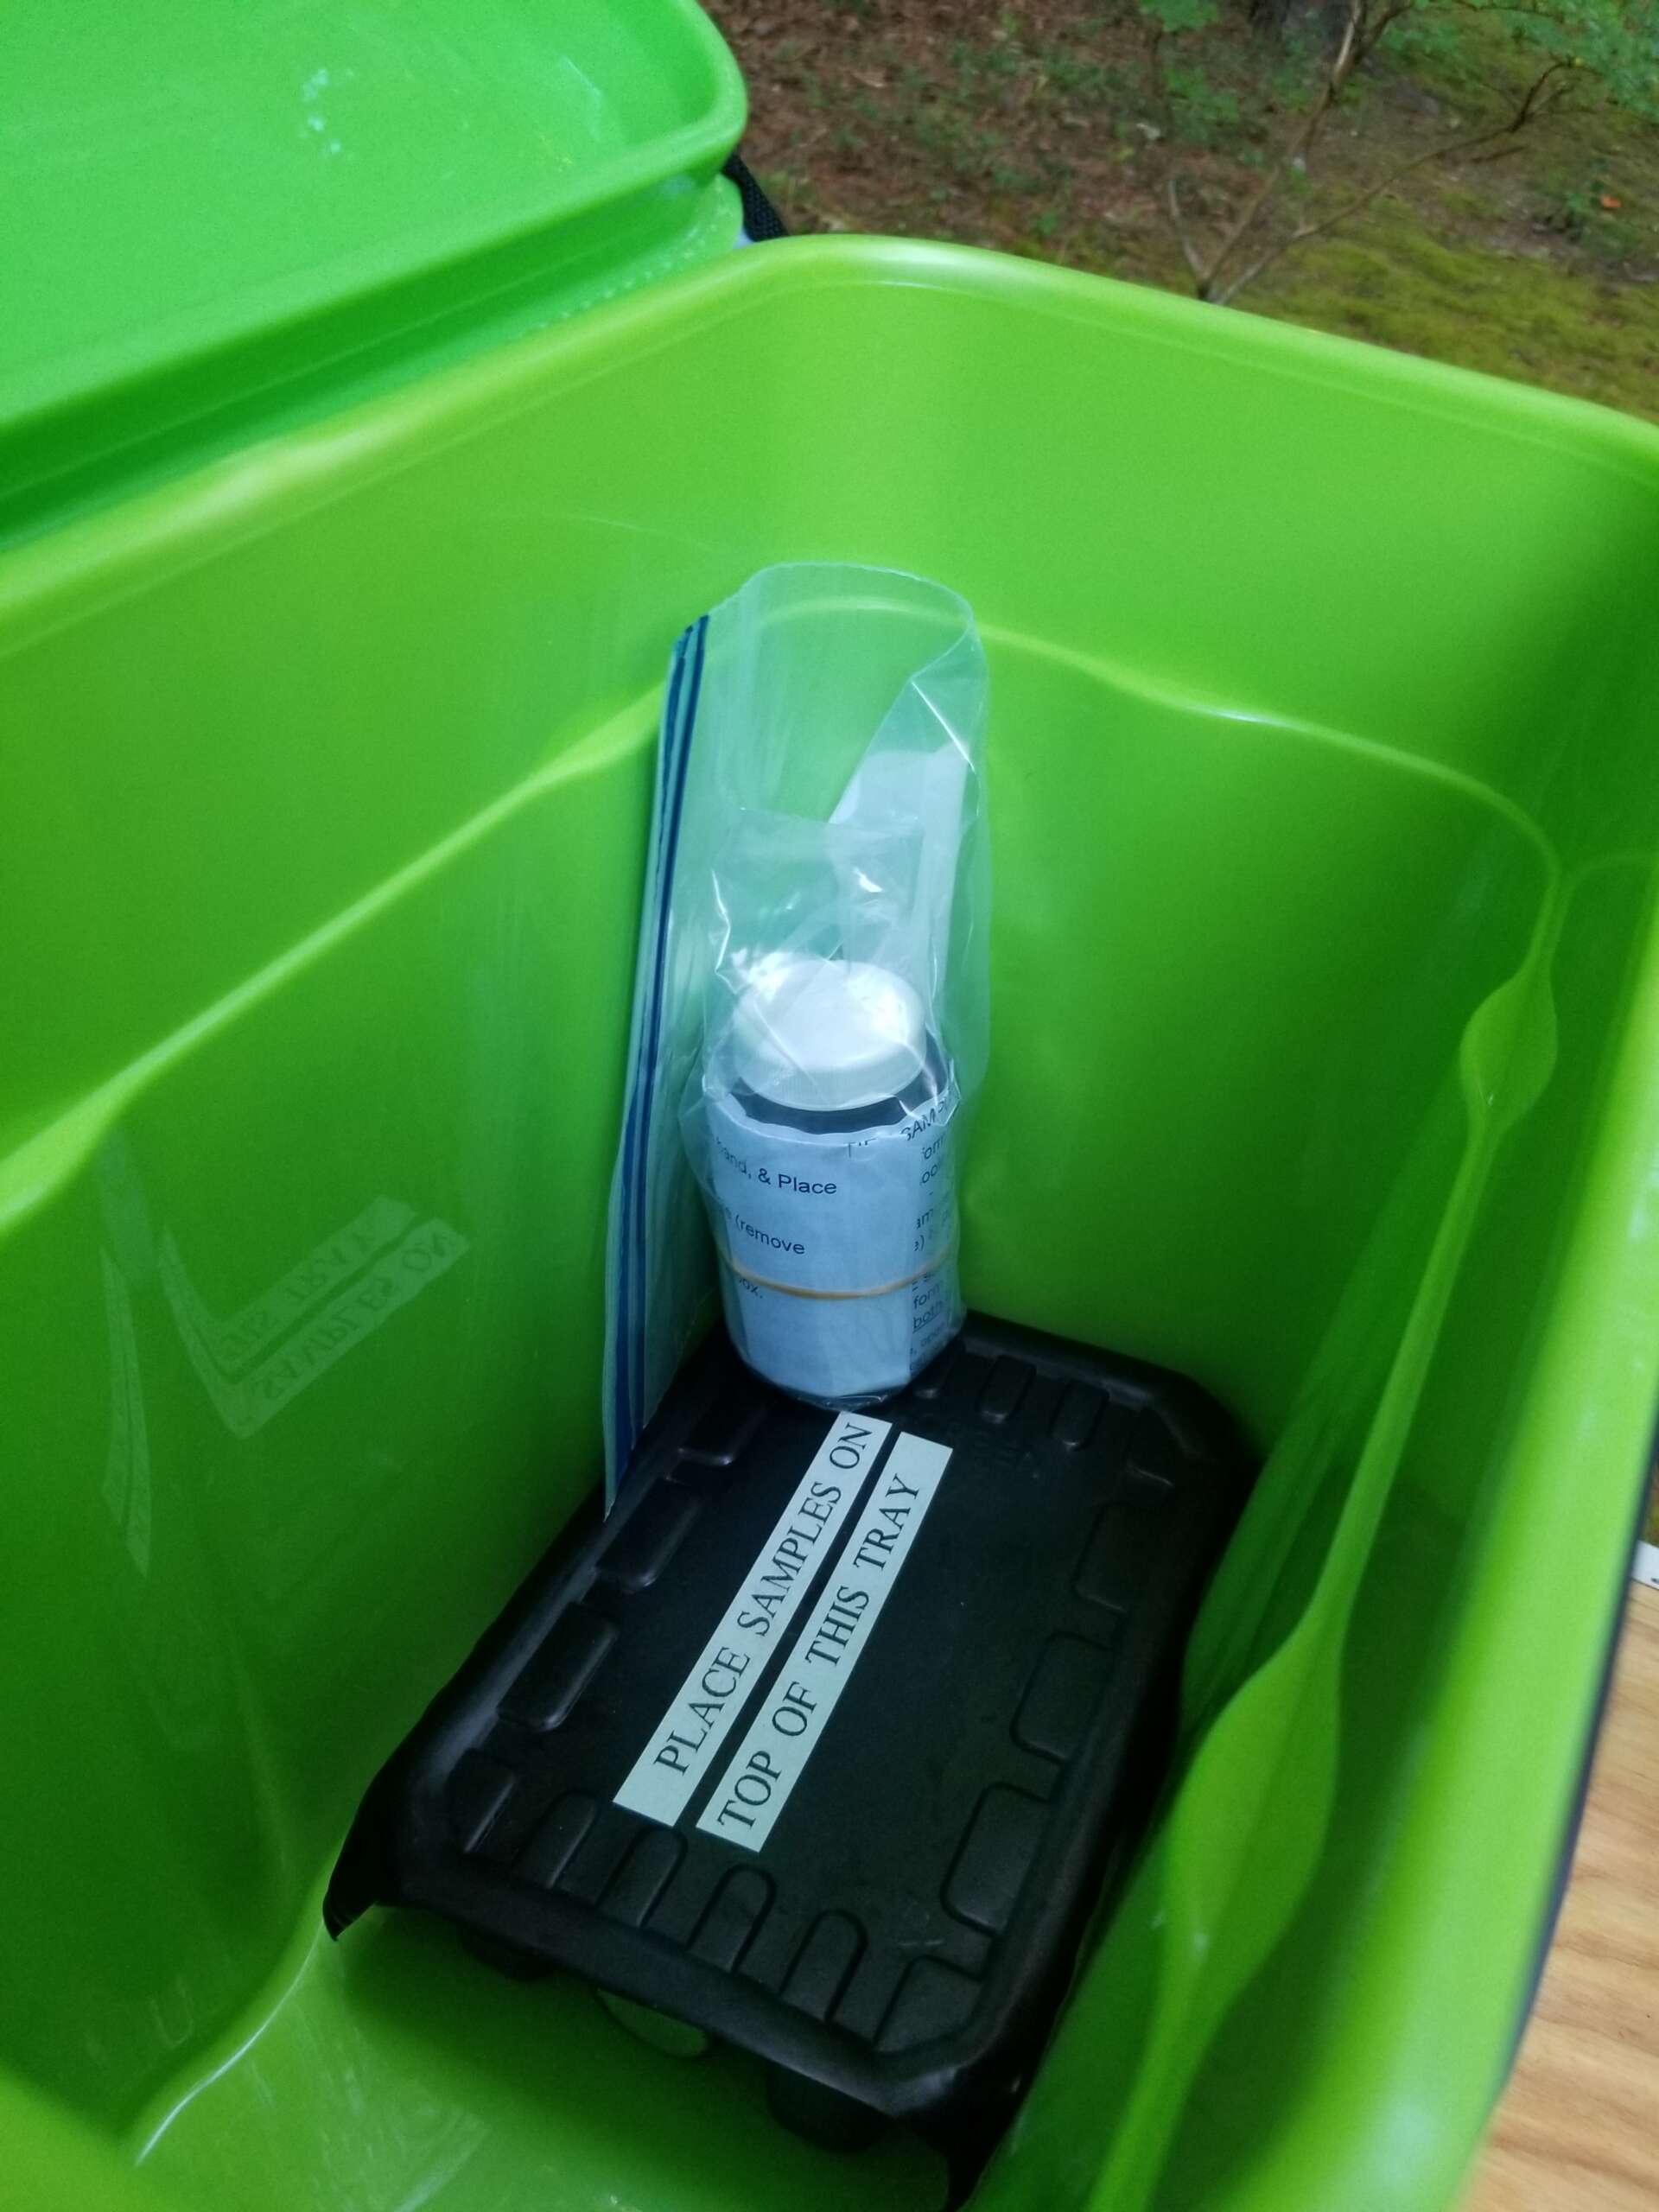
8. Place Sample In Cooler
Step 8: Within the cooler, place sample on top of the black tray. Close the cooler, and close the dropbox.
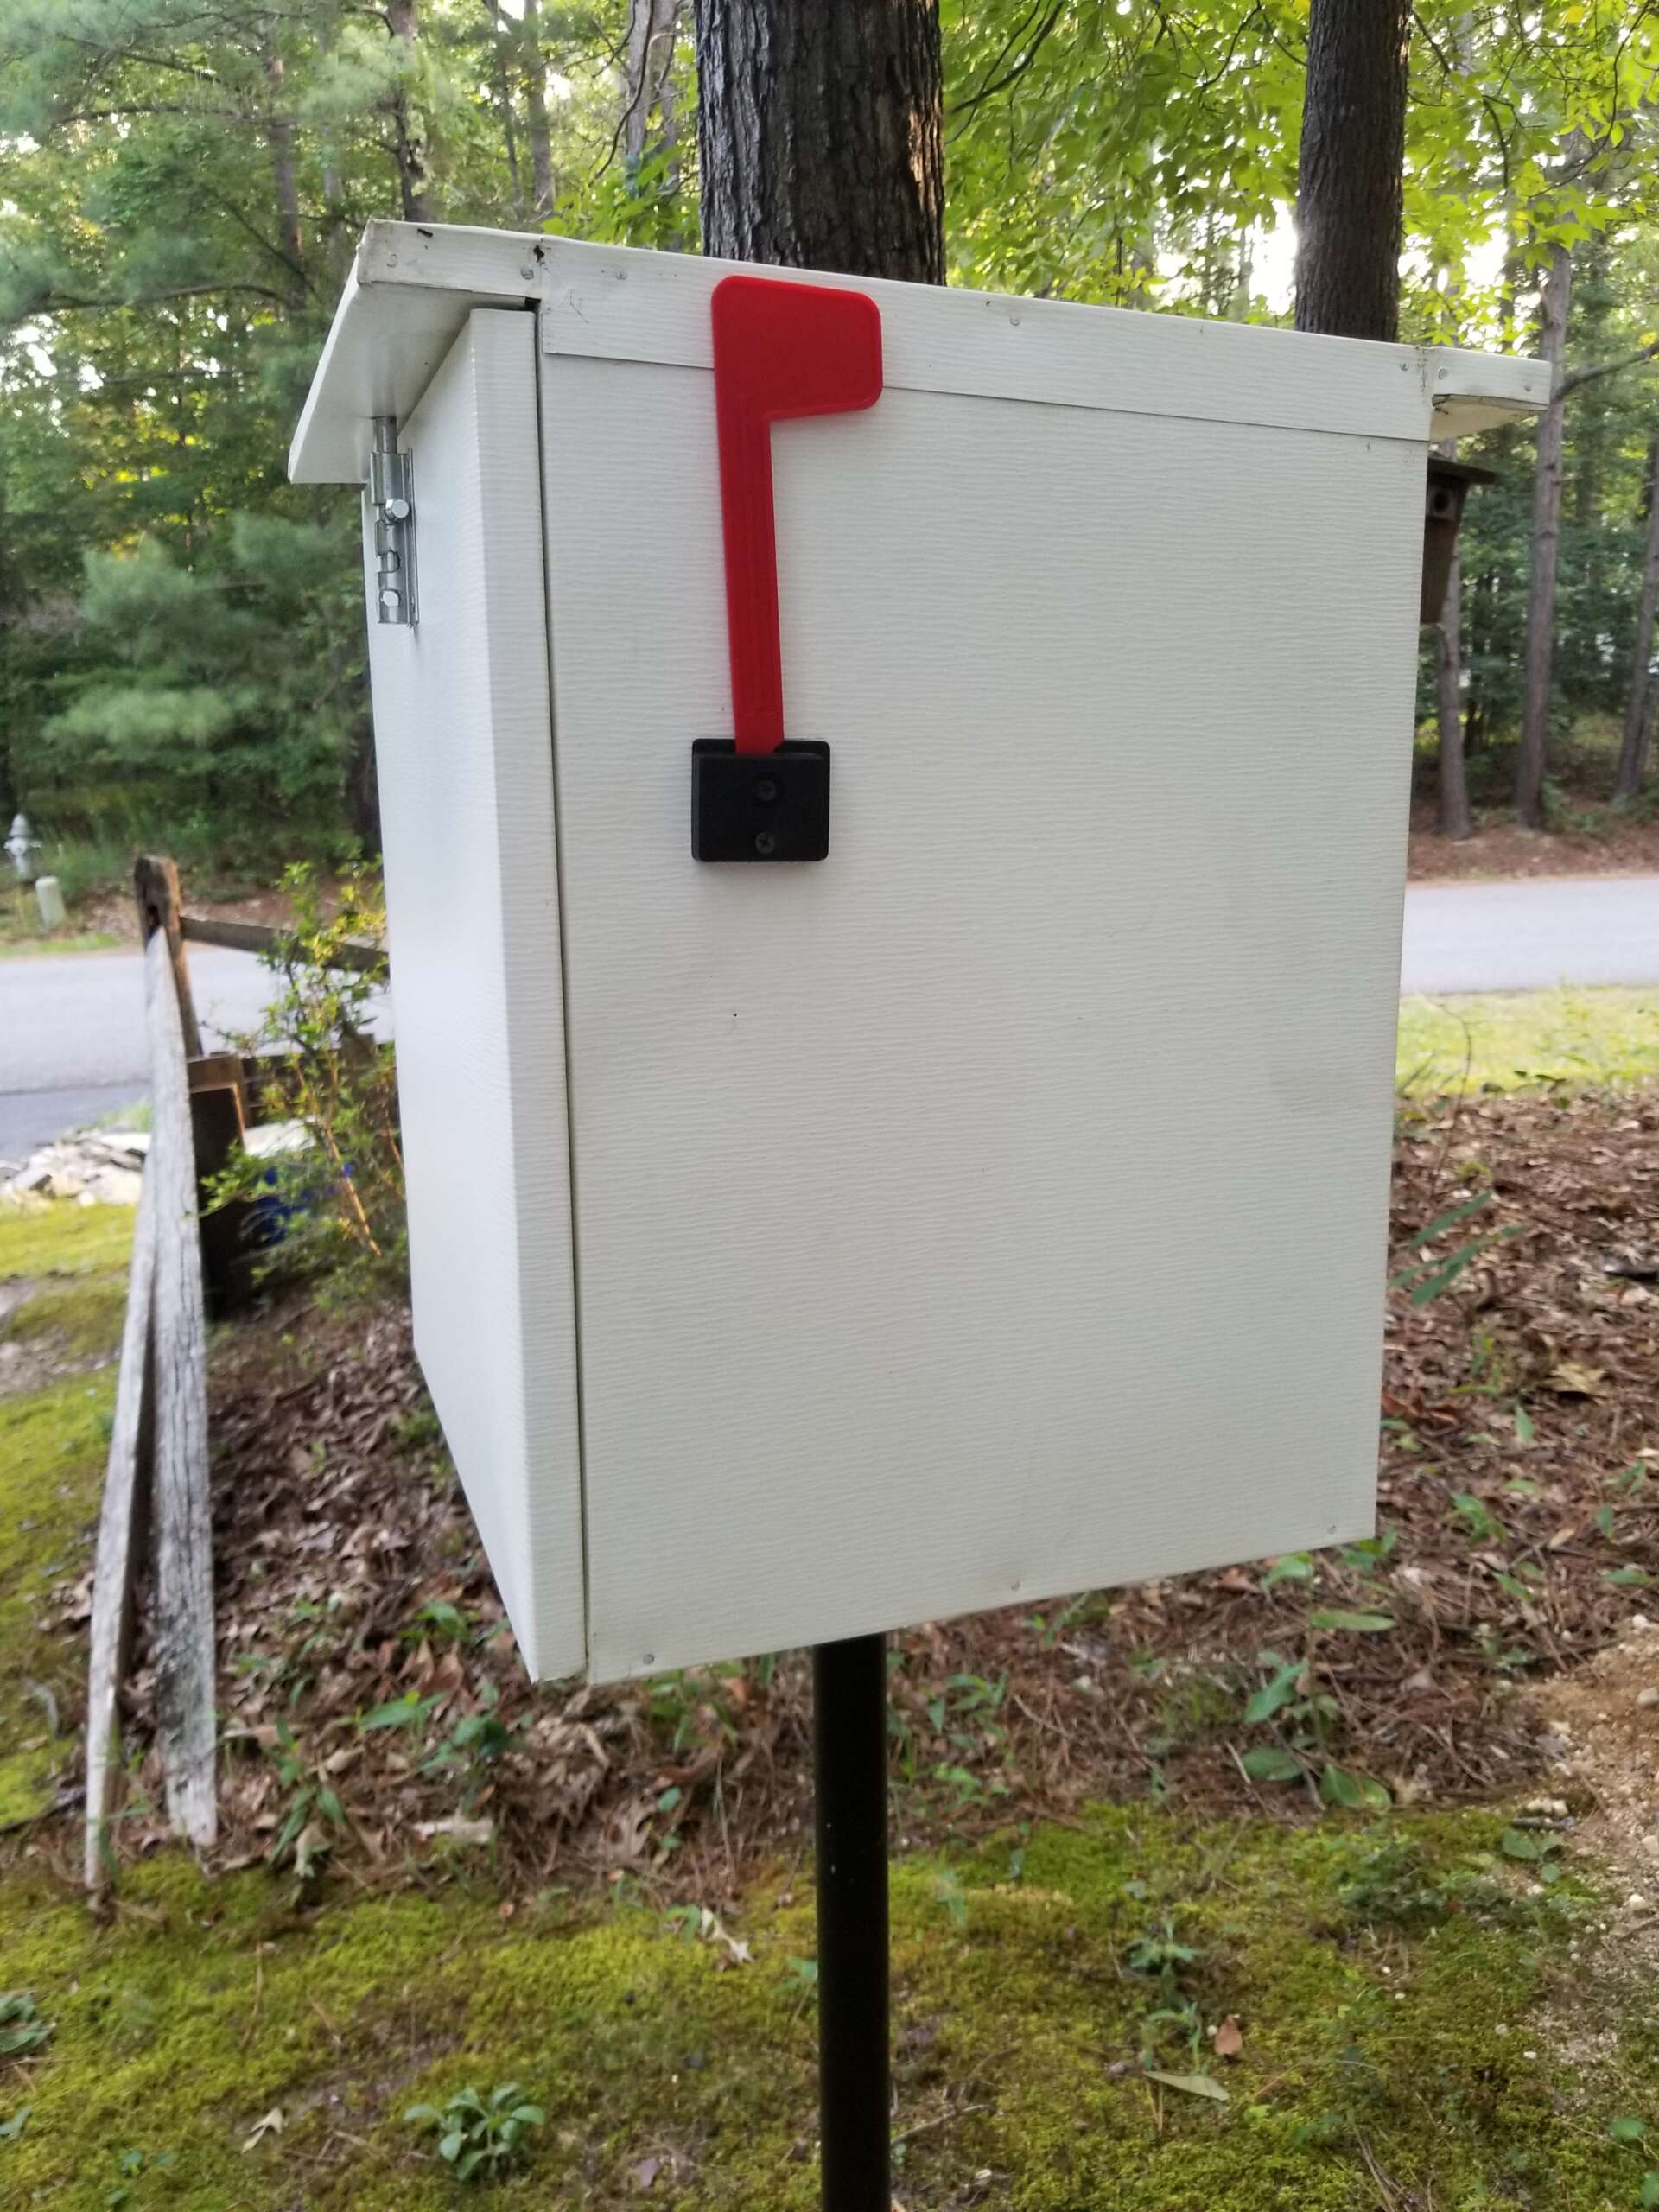
9. Raise The Flag
Step 9: Please raise the flag on the outside of the dropbox, to let us know a sample has been delivered.
10. Test Results
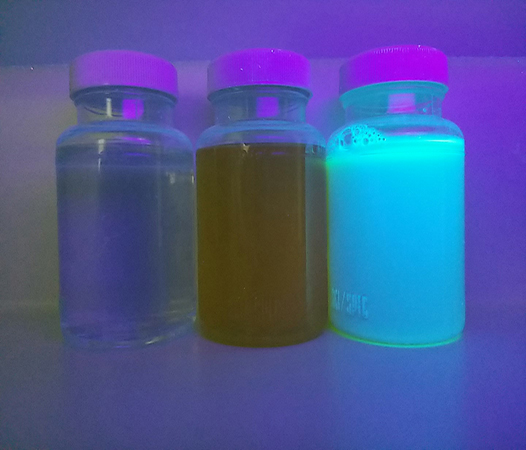
RESULTS: We will email you (the following day) when the results are complete. For bacteria tests, results are based on the following
- CLEAR = PASS
- YELLOW = FAIL, positive for total coliform
- FLUORESCENT = FAIL, positive for total coliform and e.coli.
 Available For Download:
Collection Instructions
Testing & Drop-Off Tips

Please use proper containers and fill to neck. Sterile containers are needed for bacteria tests, and cannot be used for chemical tests.
Contact Us
Contact Us